Bringing illustrations to life with Rive
5 min read
Whether you’re a designer, Illustrator, or animator, I don’t think there’s ever been a better time to diversify your skill set and explore emerging technologies.
I’m always looking for new tools to help with the design process and Rive is a real-time animation tool used to create interactive animations. It has built-in state machines, which allow you to add inputs and commands. You can rename, edit, and stack these together to create more complex animations quickly and effectively.
This might seem like a bunch of random words strung together to make me sound super smart, but it allows for extensive customisation in one tool. I’ve spent some time learning the basics, so let’s break it down and take you on a journey.
Let’s dive into Rive
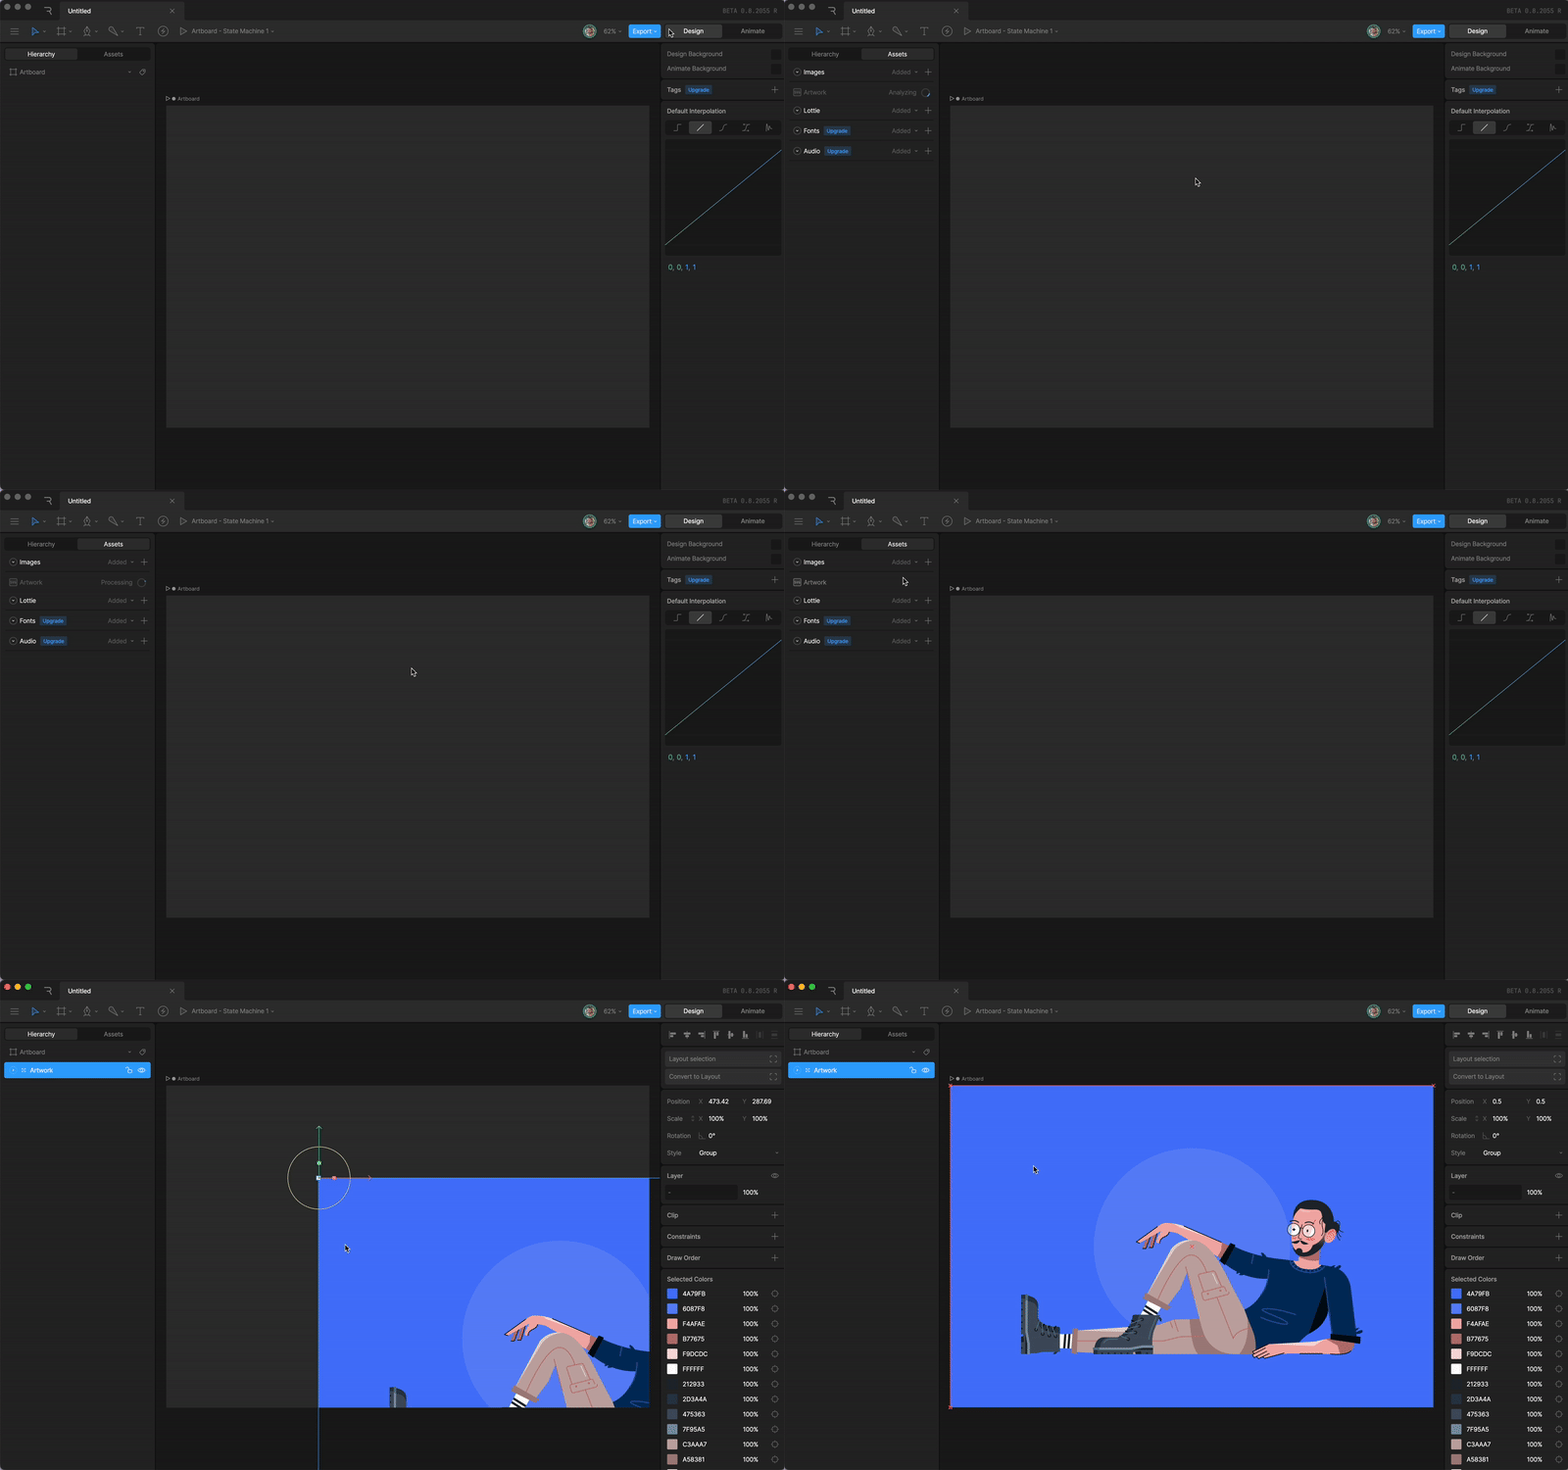
I’ll hold my hands up, I’m an Adobe Illustrator nerd. I’ve used it for years and I find it very difficult to move away from. While you can create your artwork directly in Rive’s dedicated platform, they’ve also thought about old-school designers like me who just can’t move away. It is super easy to export artwork as a .svg file and drag and drop it into Rive.
Now you’ve got your artwork set up, and hopefully used better naming conventions than I have, you’re ready to add the bones. These are part of a skeletal system that allows you to create linked characters and objects. Bones create a hierarchy, where each bone can be parented to another.
The best way to explain this is to think about the bones in a human body or the branches on a tree. Each branch can move individually, but still be hierarchically connected to another. Whilst I haven’t done it in this example, you can also explore skinning options. This allows shapes to deform based on their movement.
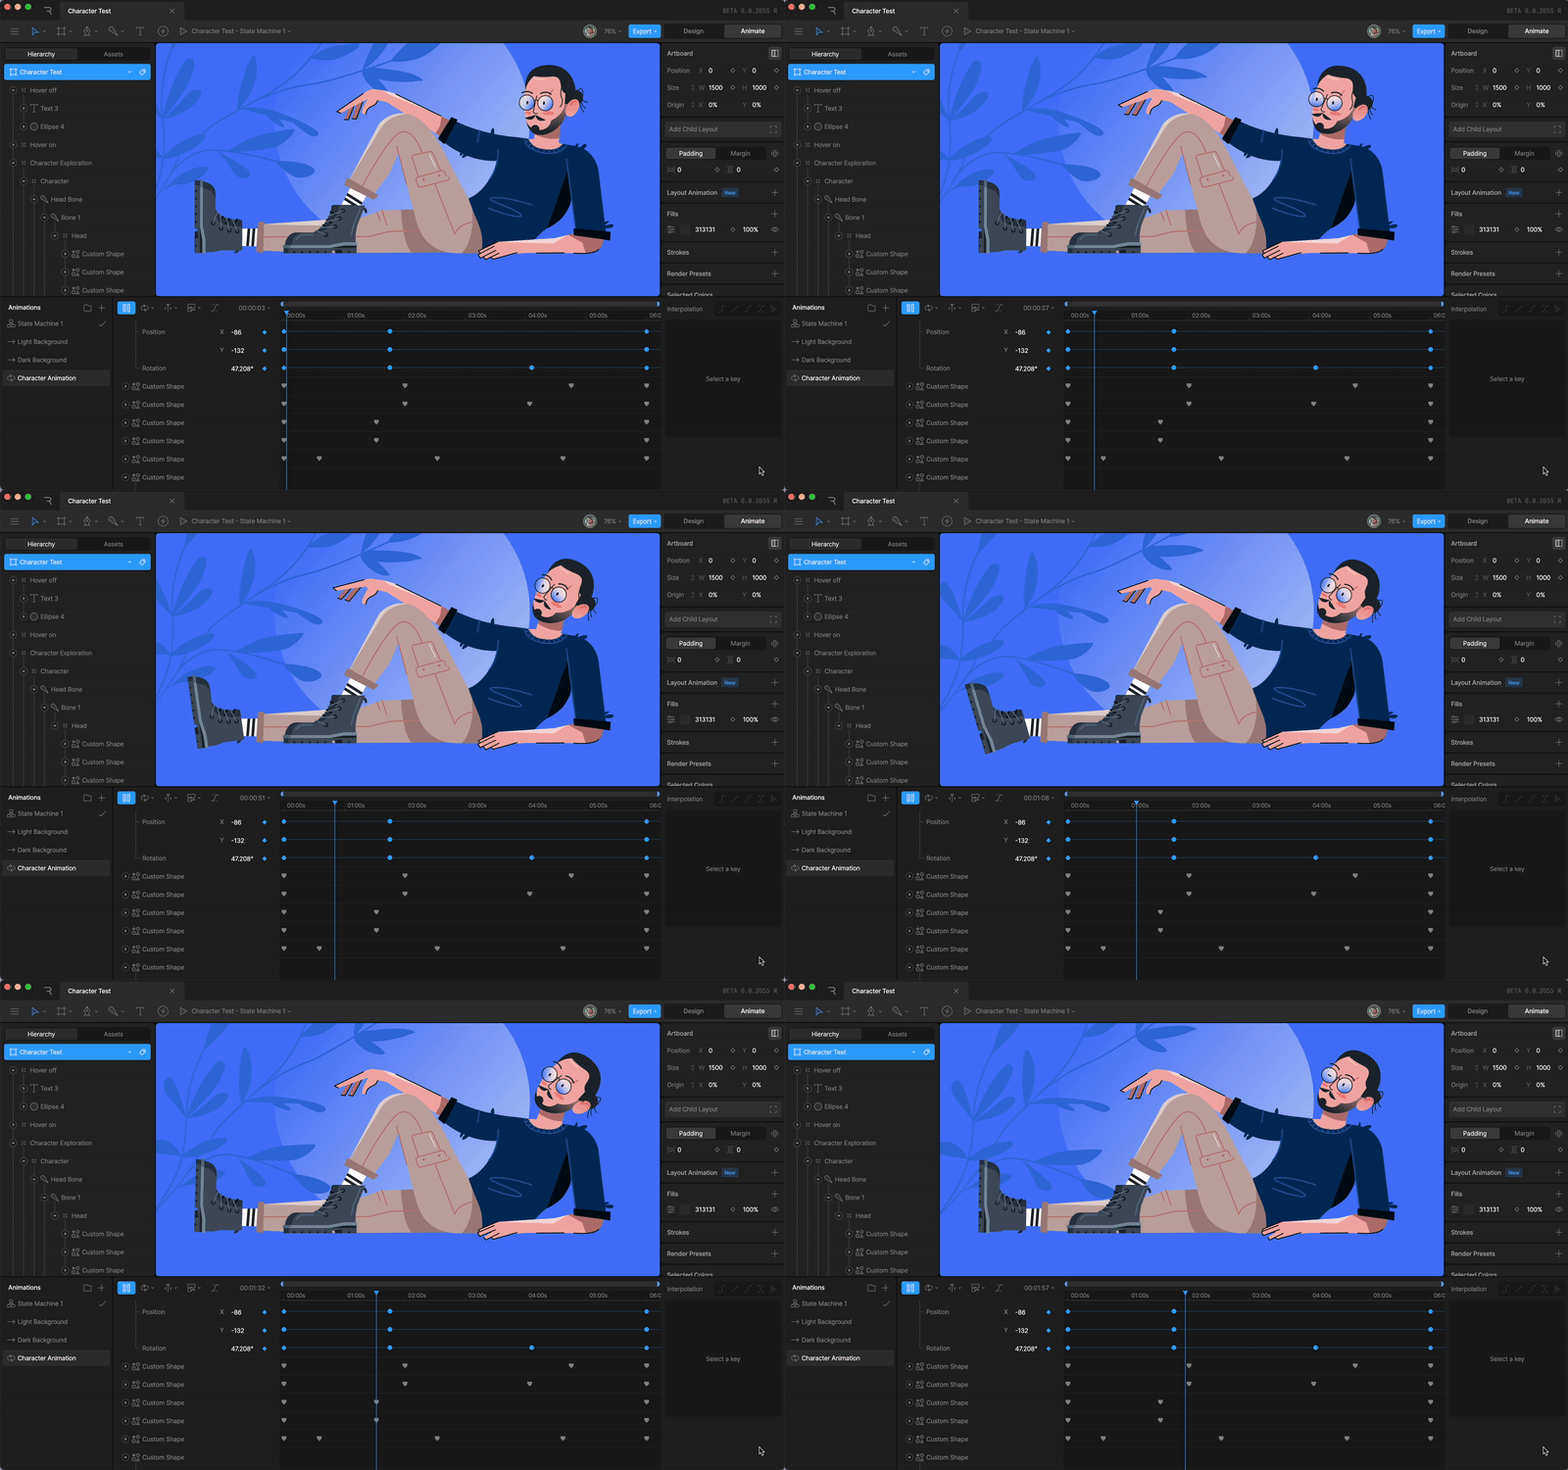
The next step is animation. Much like you’d expect in similar tools, Rive gives you a timeline view, where you can add keyframes for every object or bone. You can easily pick what you want to change, whether it’s the position, rotation, or size of an object. You can also tweak the interpolation of each keyframe, allowing you to make something move in a more linear or cubic value.
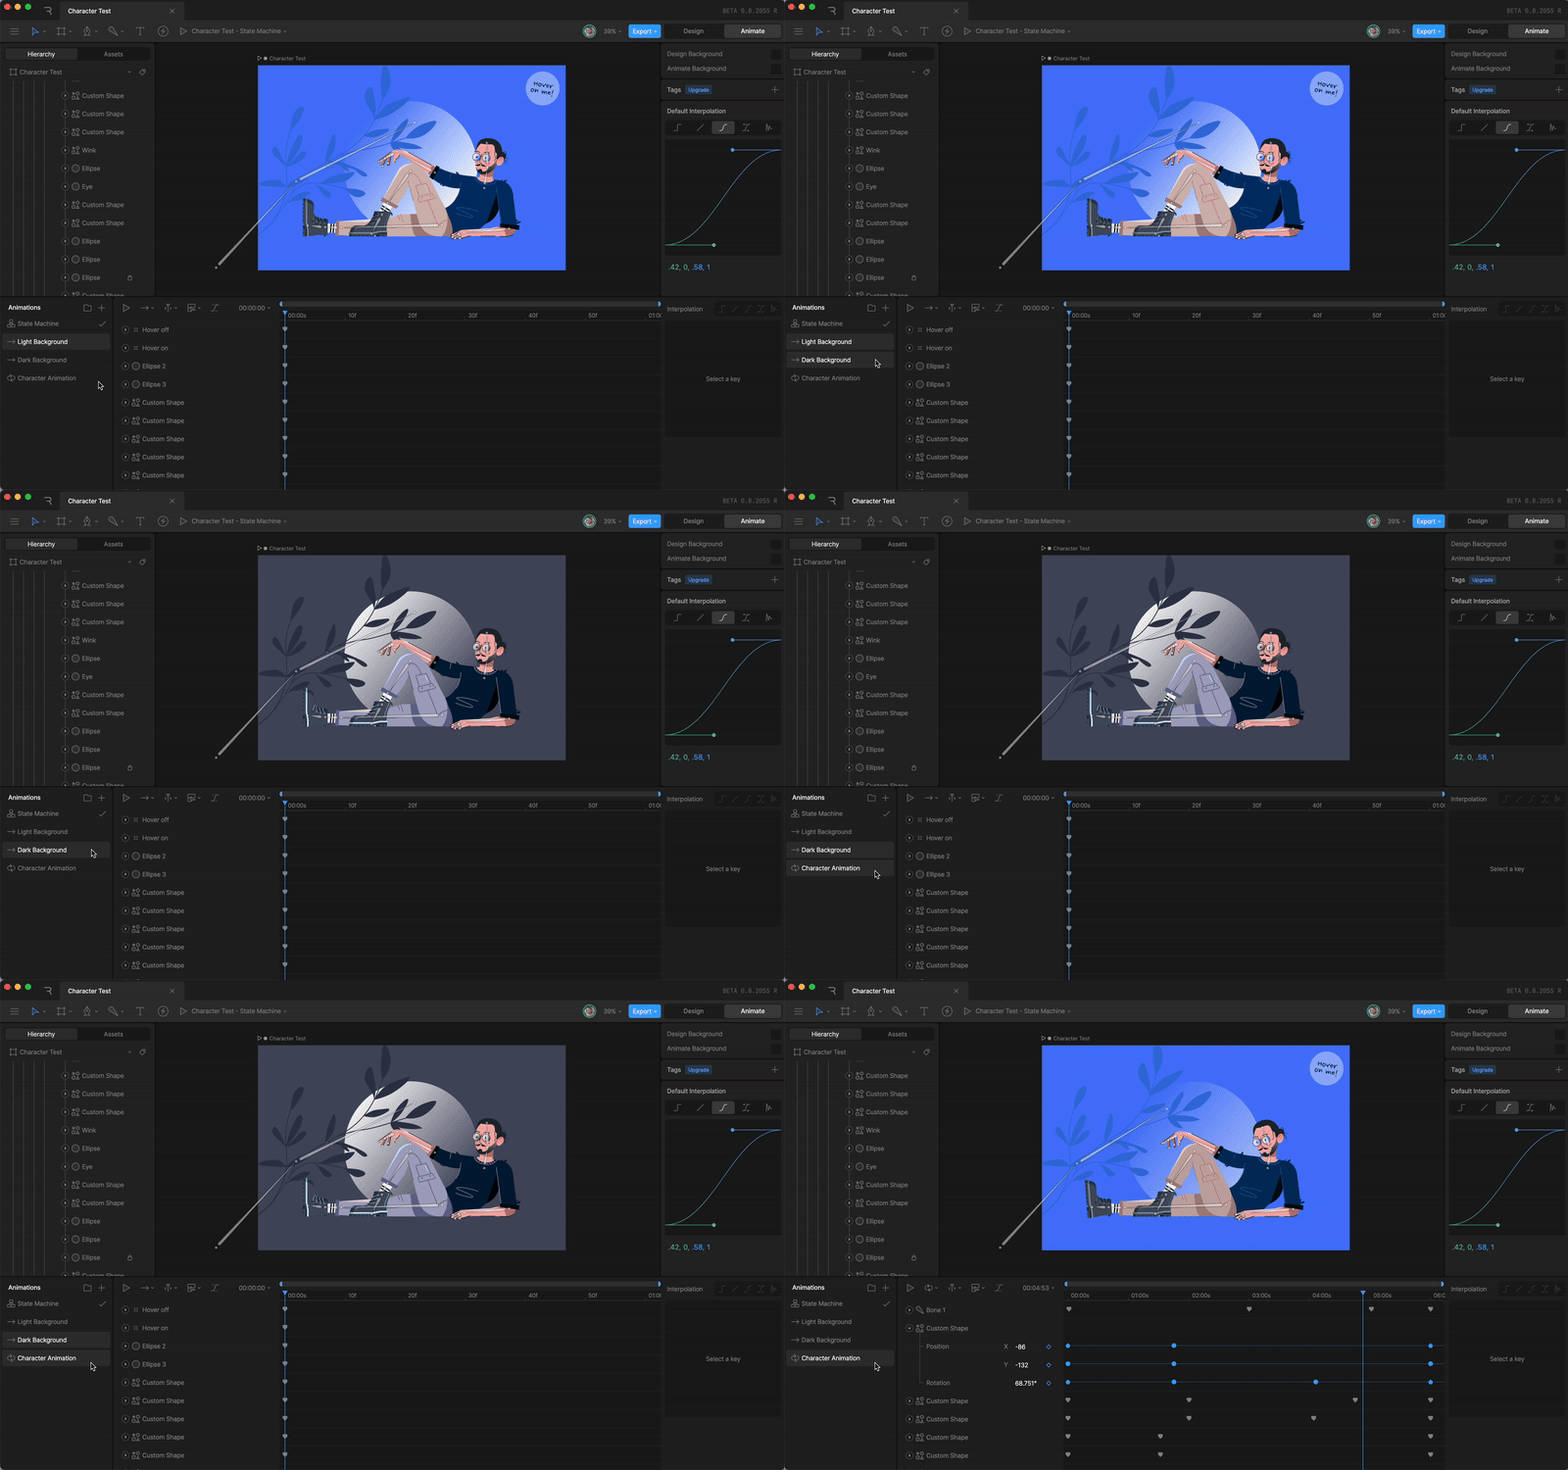
This is where the magic really happens. Rive allows you to stack or blend timelines. Here you can have multiple animations working together. In this example, I wanted my character to have his own animation, but I wanted the background to change colours separately.
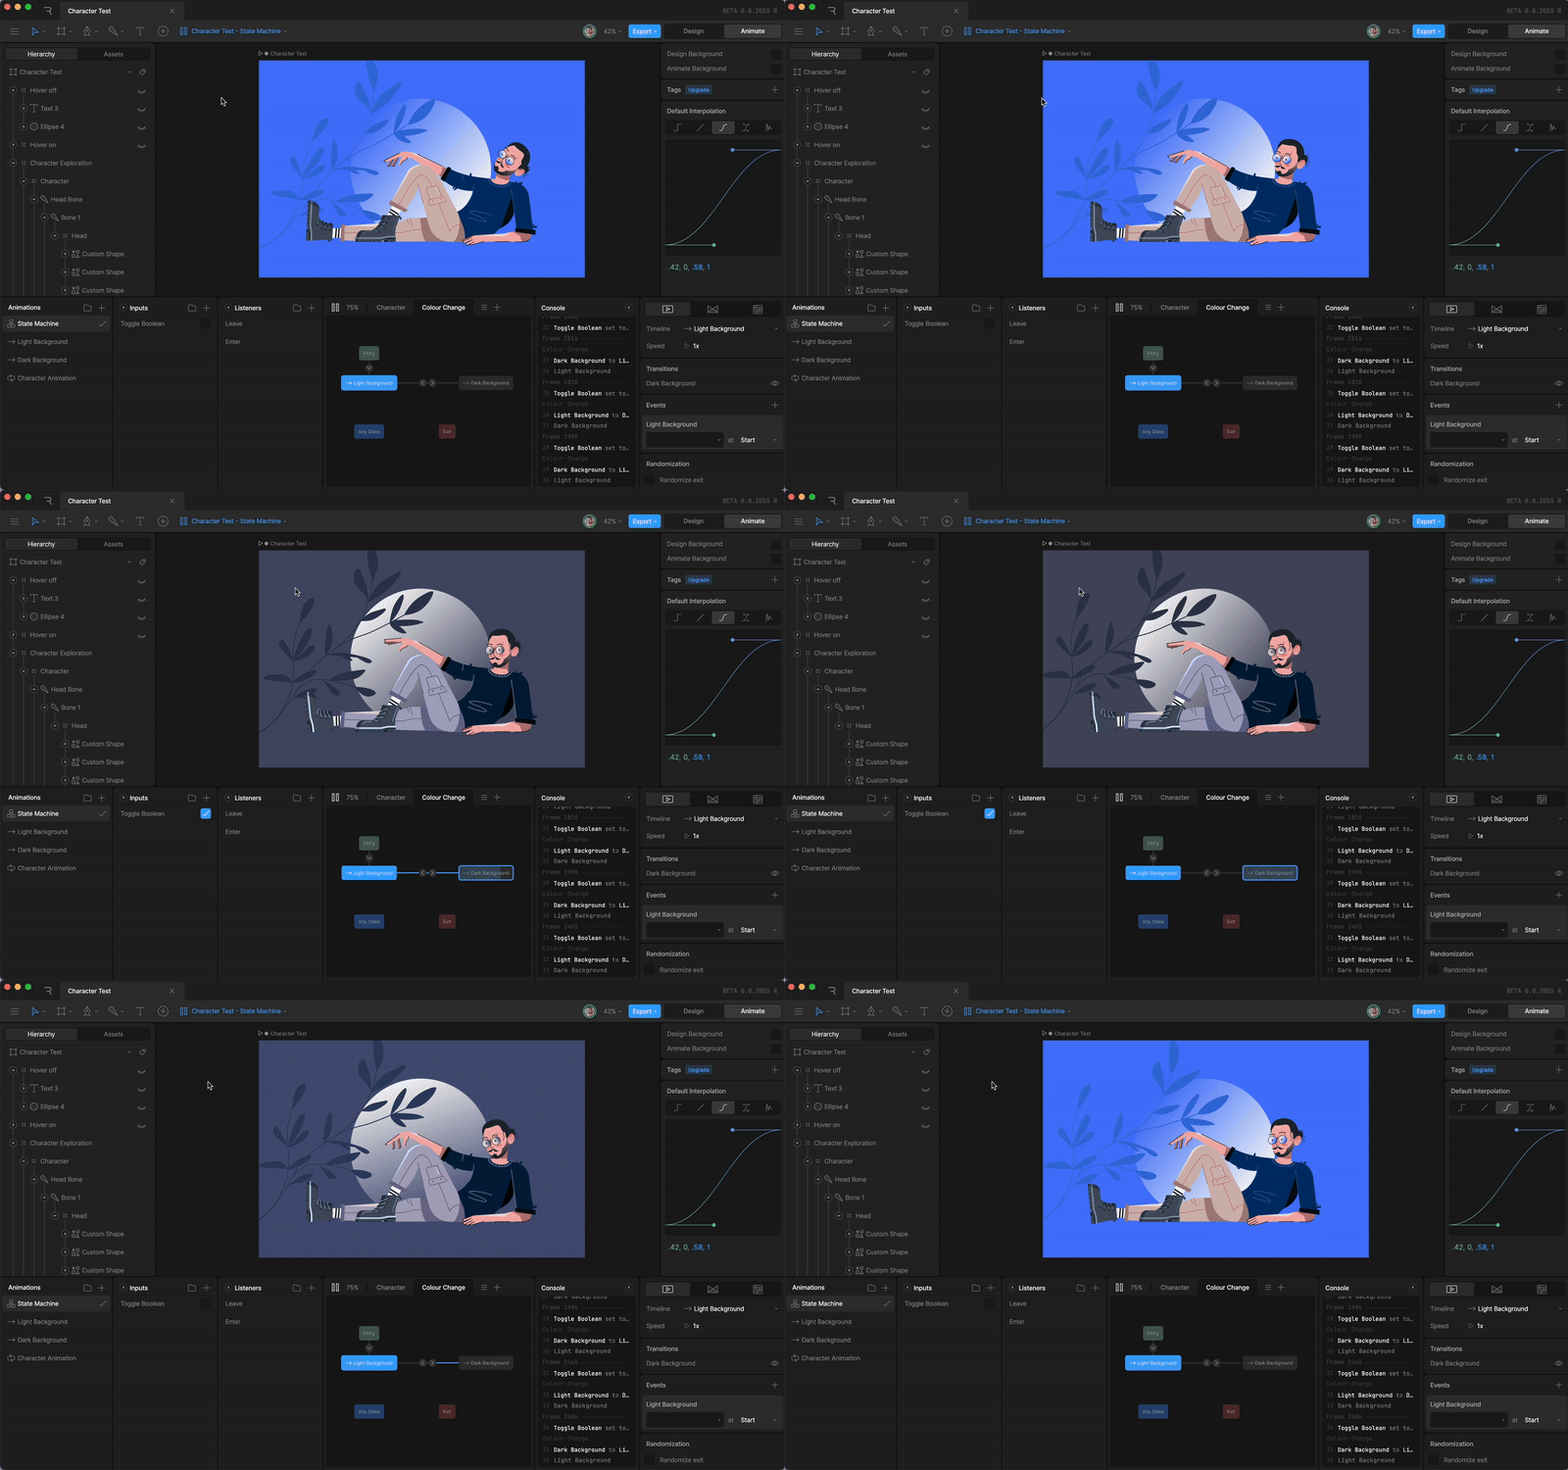
Rive has a powerful feature called a State Machine. Here you can set up states to represent specific conditions. I wanted the background to change colour on mouse hover, so I set up a boolean input and created two listener states. If my mouse enters the artboard, the boolean condition is set to ‘true’ and if it leaves it changes to ‘false’ and reverts back to the original state. This is a very simple transition, but with Rive you can create more complex conditions. As an example, a character could switch between idle, walking, and running based entirely on user inputs.
It's time to hit export
Once your animation is complete, you can export it as a .riv file. This format includes all the artwork, animations, and state machines. This file is then easily integrated into a development environment to test and refine. Don't believe me? Interact with the artwork below and witness the magic happen for yourself!
In summary...
For me, Rive's standout feature is its state machine system, enabling me to create complex animations that can transition between different states based on user interactions or events, without the need for extensive support from our developers (which is a plus for them, too!)
That means streamlining the design and development process, making it more efficient and less of a headache when it comes to development. It also means that I'm able to make animations move how I want them to in design.
What's more, by learning how to use Rive, I've found the community and extensive resources such as tutorials and documentation brilliant and can't wait to see what can be done with Rive on future projects.

Jamie Robinson
A Creative Lead pushes boundaries by elevating digital identities and innovative technologies such as 3D motion and Lottie.
He has specialist knowledge in digital brands and animation.
Connect on LinkedIn.
Elevate your digital presence with bespoke illustration
3 min read

Why use 3D on your website design
3 min read
